What this does
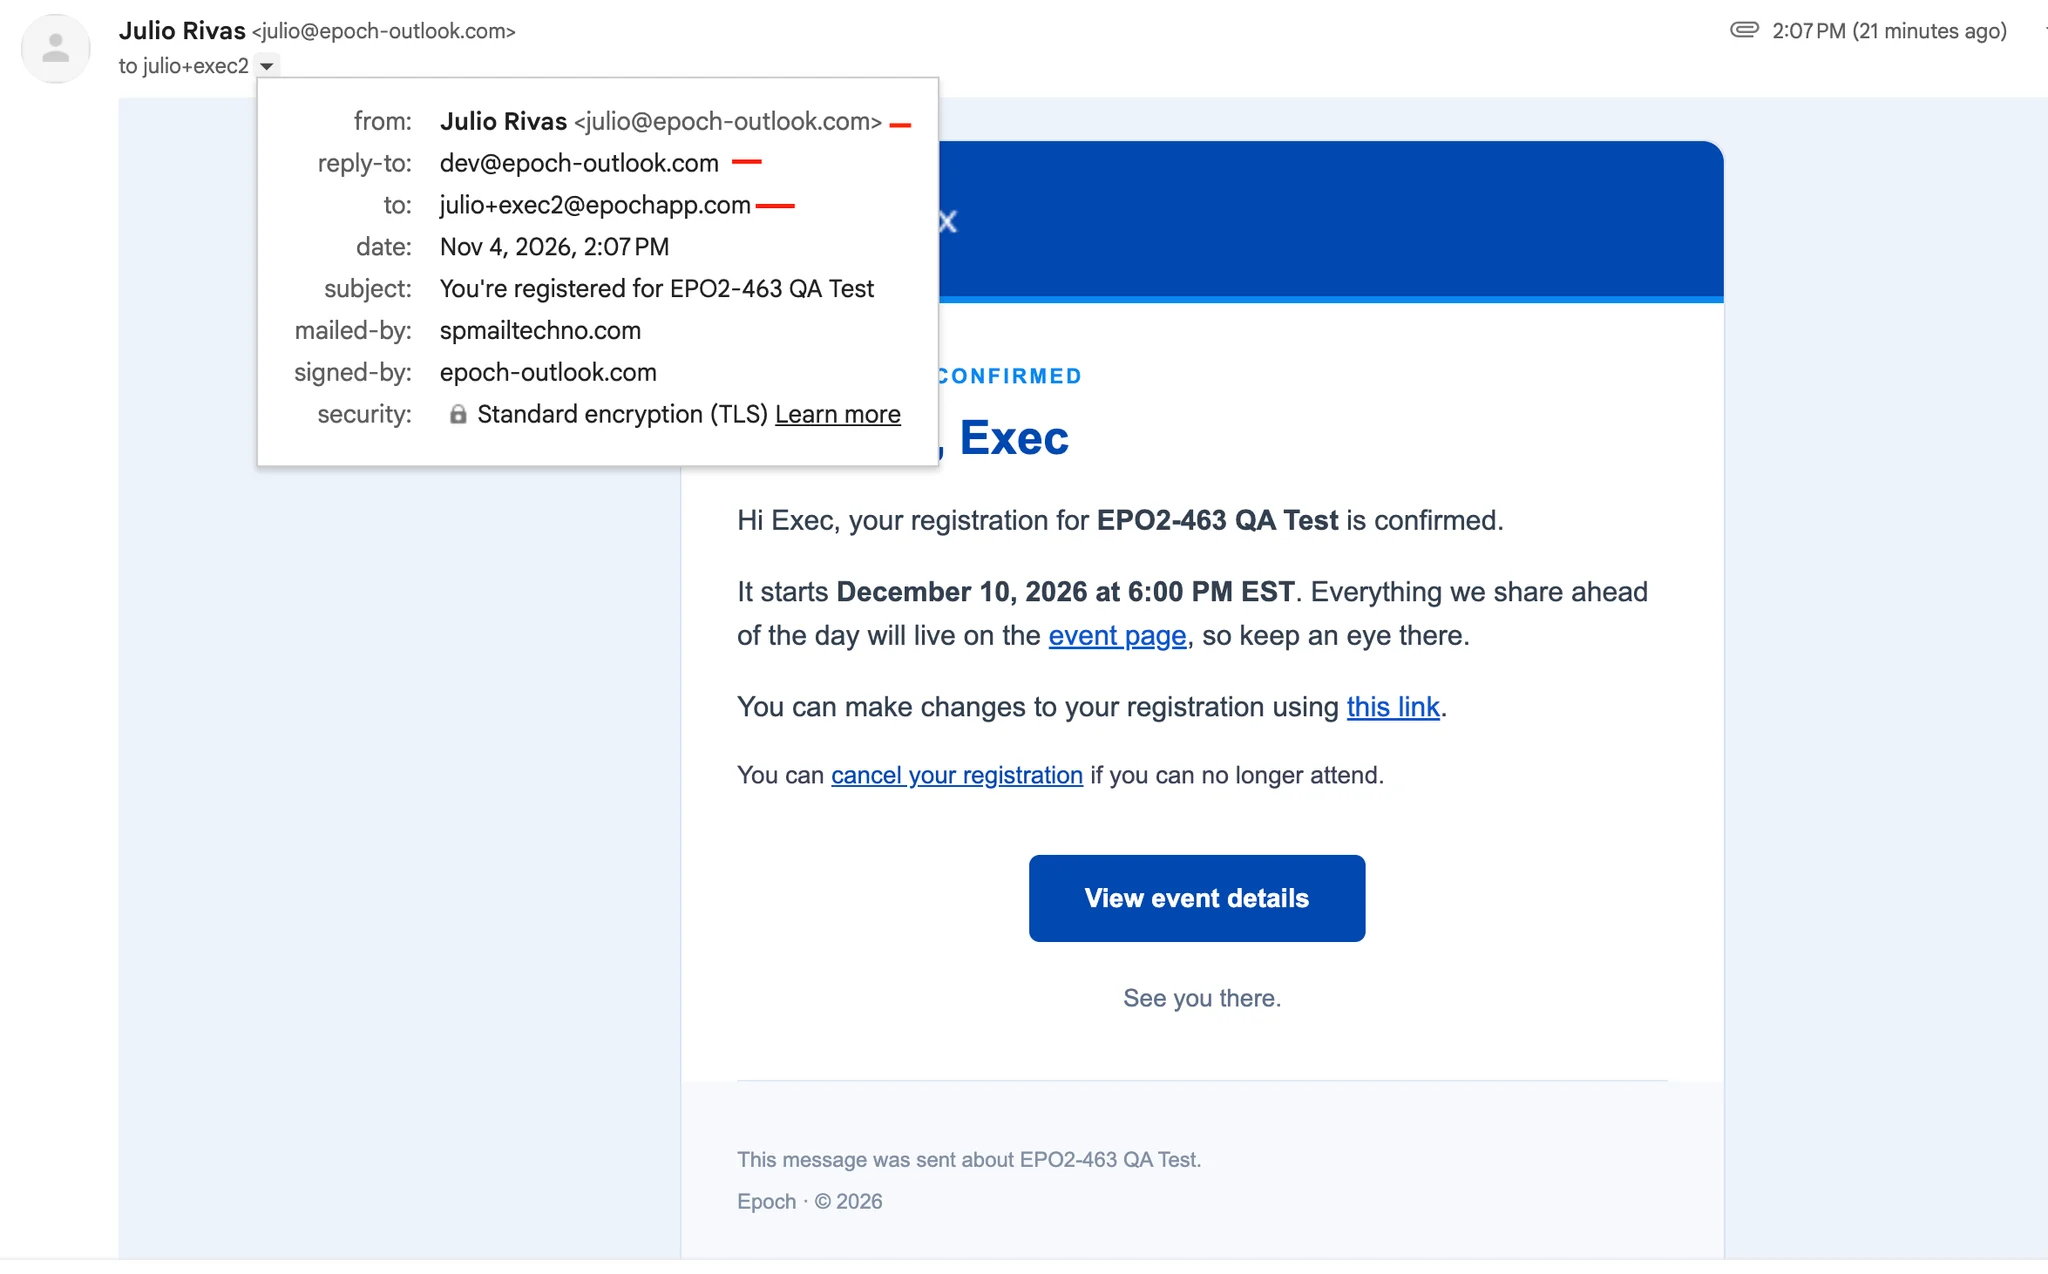
By default, EpochX sends every guest email as Epoch team@mail.epochapp.com. This guide makes an event send its emails as a named person at the customer's company. That person can be the host, a sales rep, a partner, or an exec. Replies go to a shared inbox.
The setup has four steps. You do steps 1 and 2 once per organization. You do steps 3 and 4 for each event.
Before you start
- You need an org admin login for steps 1 and 2.
- The organization needs the Starter or Pro plan. The plan feature is "Sending from your own domain".
- Someone at the customer must add one DNS record to the company domain. The IT team usually does this.
- The sending domain must be a domain the customer owns, for example
acme.com. Free personal mail domains such asgmail.com,outlook.comoricloud.comdo not work. Epoch's own domains do not work. A company on Microsoft 365 or Google Workspace is fine if it uses its own domain. - The sender address does not need a real mailbox. It only needs to be on the verified domain.
- The screenshots come from our stage test with the epoch-outlook.com domain.
Step 1. Verify the customer's domain (once)
- Click the team switcher at the top left and open Organization. Then open the Settings tab.
- Under Sending domains, type the domain in "Add a domain", for example
acme.com. Click Add domain. - The new row shows Pending DNS and a box called "Finish setup". The box shows one record: Type
TXT, a Host that starts withscph, and a long Value that starts withv=DKIM1. - Send the Host and the Value to the person who manages the domain's DNS. Ask them to add one TXT record with that Host and that Value.
- That person adds the record in their DNS provider. The steps are the same everywhere: open the domain, open the DNS records, add a record of type TXT, paste the Host as the name and the Value as the content, save.
- Back in EpochX, click Check DNS. The badge changes to Verified. DNS changes can take up to one hour. If the badge stays on Pending DNS, wait and click again.
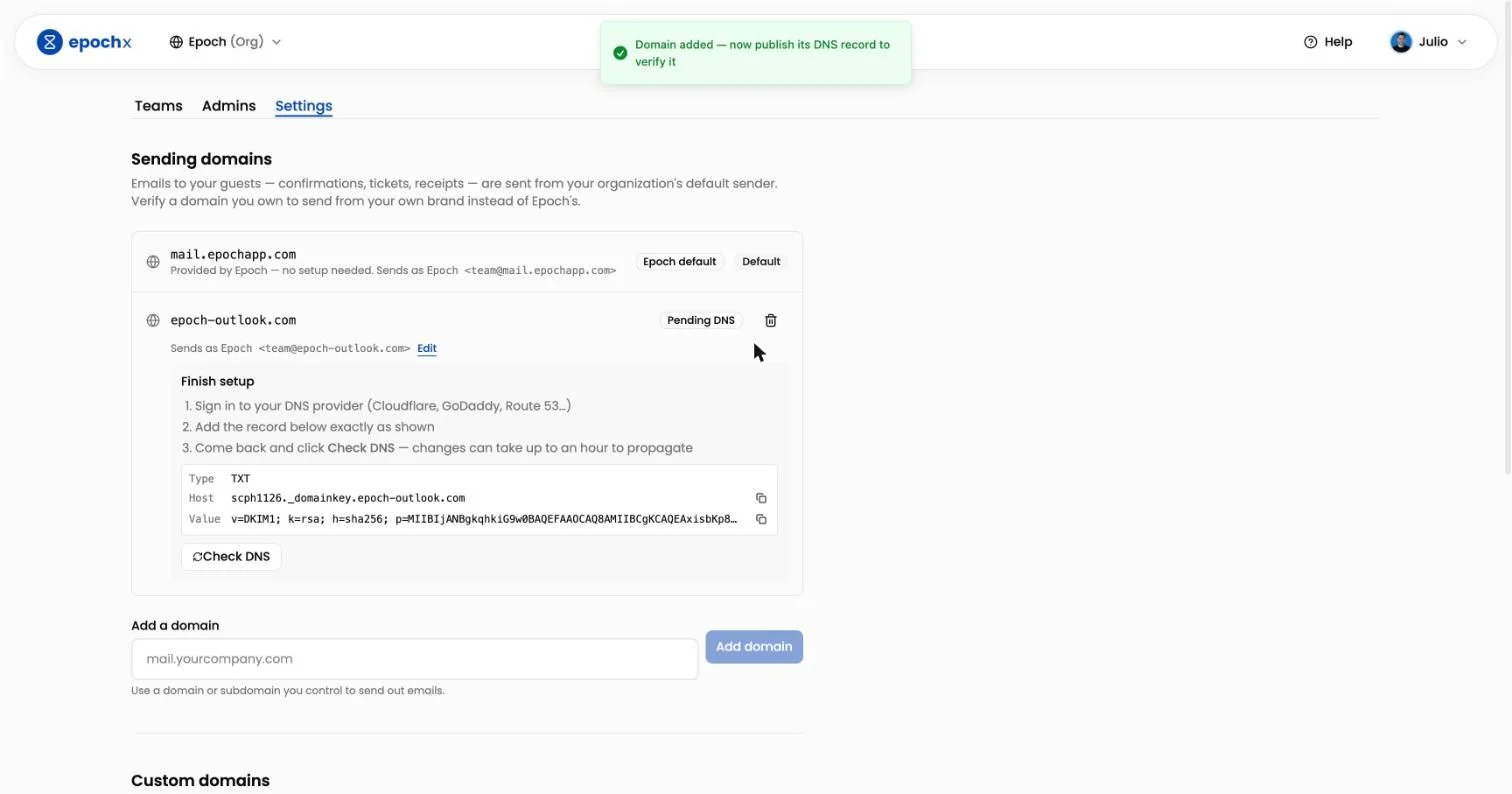
After step 2: the new row shows Pending DNS and the TXT record to add.
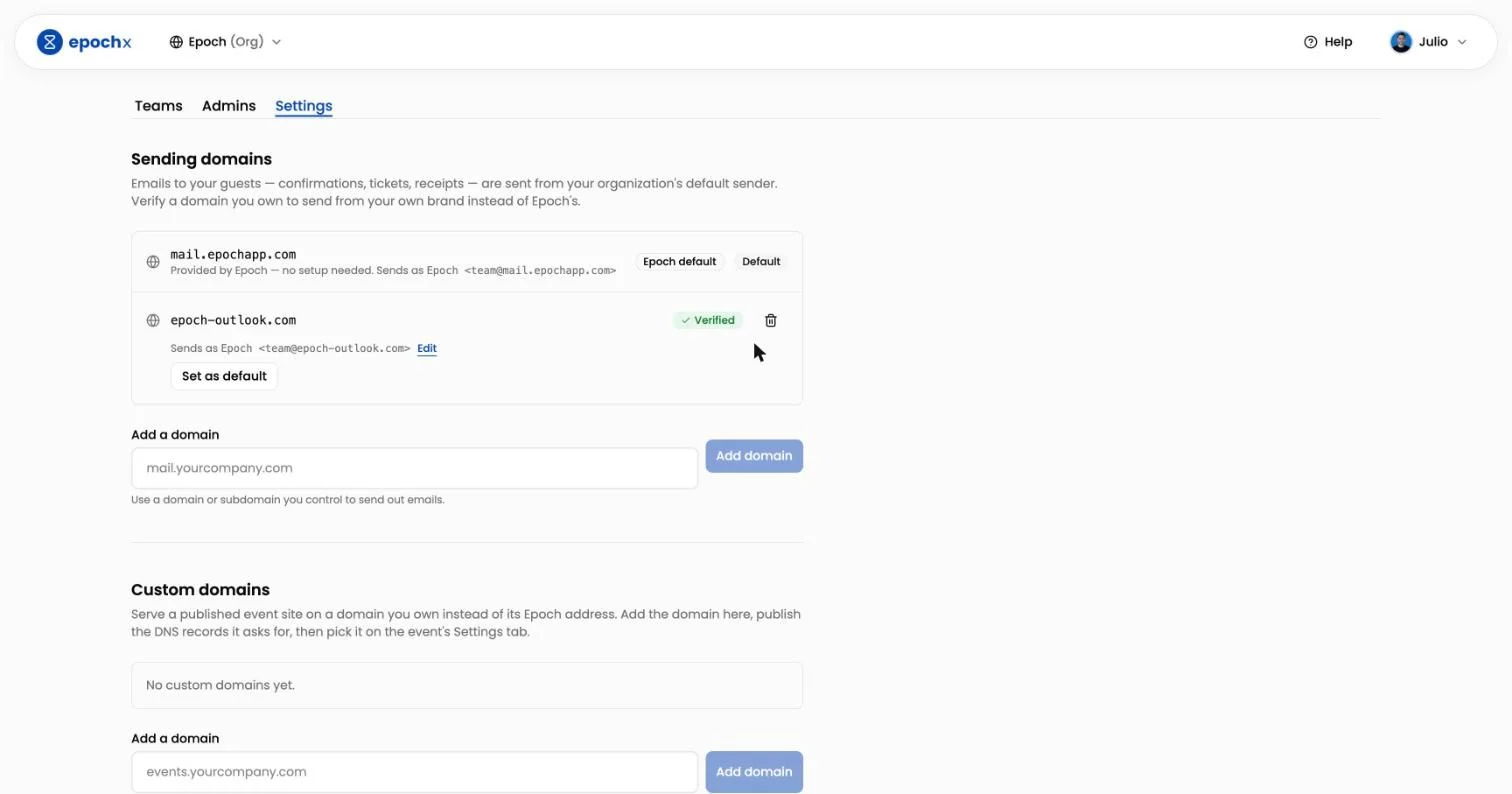
After step 6: the badge reads Verified.
Step 2. Set the person the emails come from (once per domain)
- On the verified row, click Edit.
- In Sender name, type the person's name, for example
Jane Doe. - In Sender address, type the part before the @, for example
jane. The row now reads "Sends as Jane Doe jane@acme.com". - Click Save.
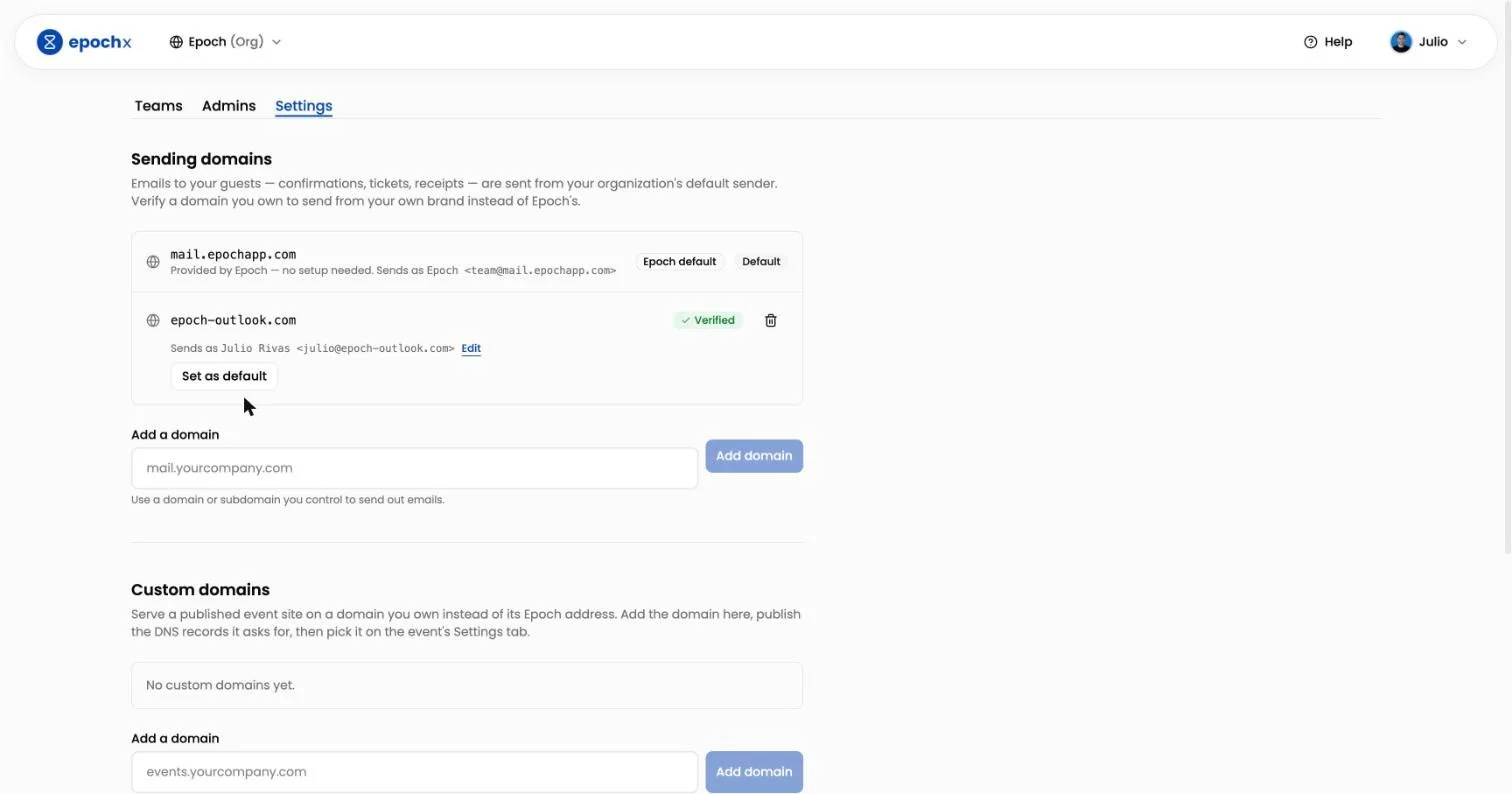
After step 4: the row reads "Sends as Julio Rivas julio@epoch-outlook.com".
Step 3. Point the event at that sender
- Open the event in the builder. Click the Settings tab.
- In the Email sender card, select the address from the dropdown. The line under "Sender name" shows the result, for example "Jane Doe jane@acme.com".
- Change Sender name only if this event needs a different name, for example "Jane Doe, Field Marketing".
- Publish the change. Click Publish at the top right. Click Preview event, then Build & preview. Wait for the build to finish. Open the Publish menu again and click Publish changes. Accept the notice "Email sender changed".
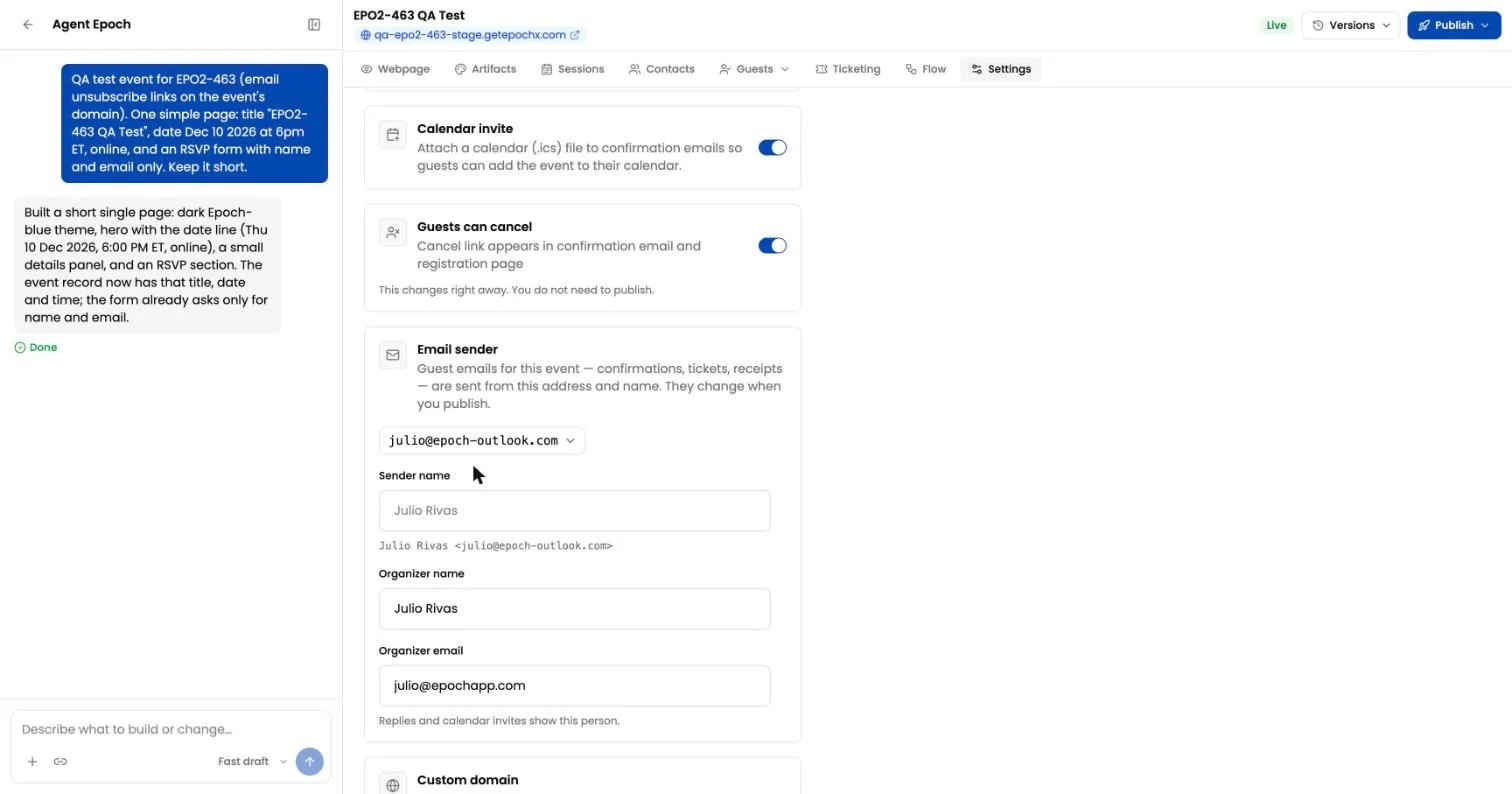
After step 2: the Email sender card shows the new address and the preview line.
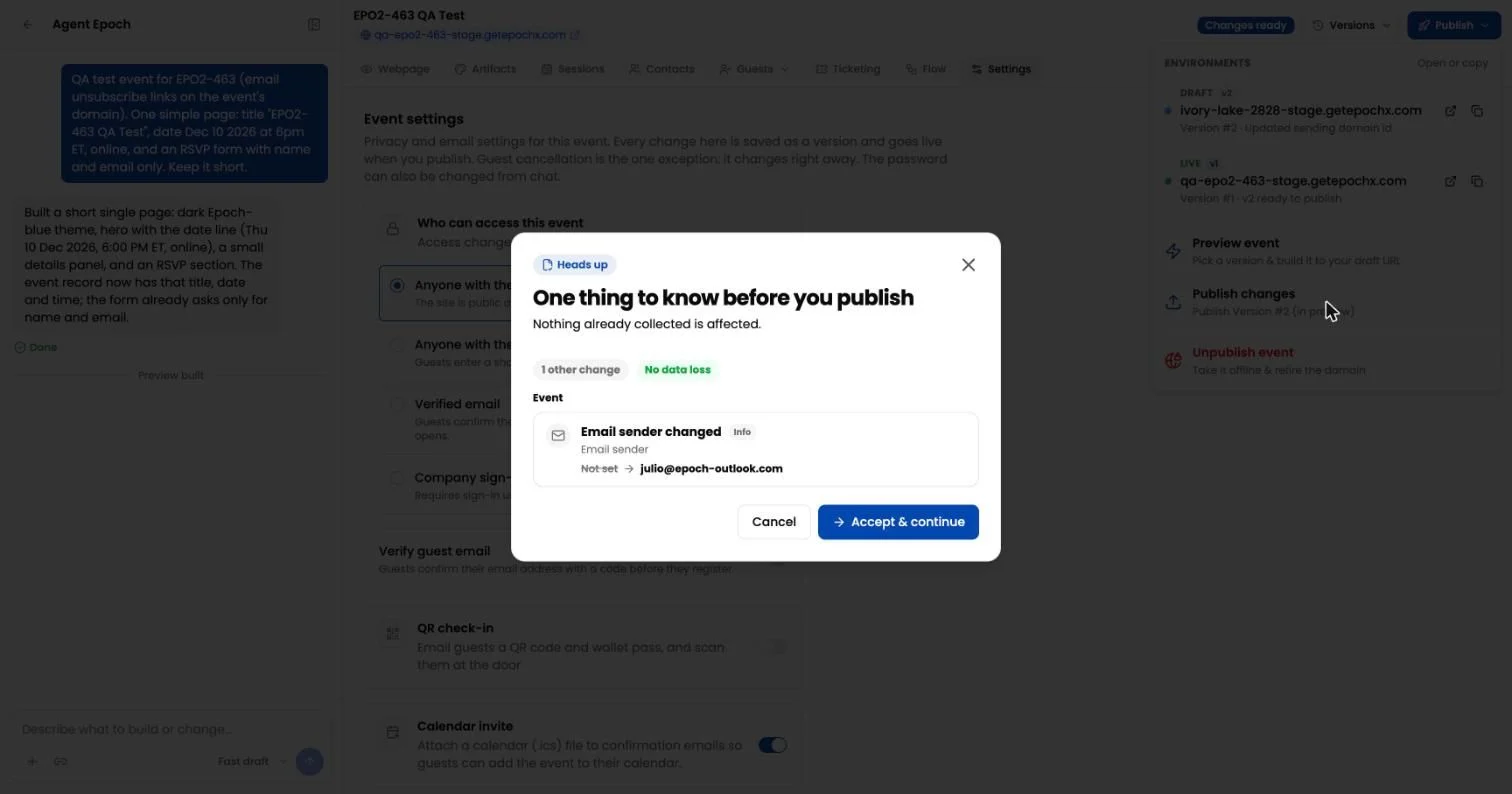
Step 4: the publish notice lists "Email sender changed". Click Accept & continue.
Step 4. Send replies to the shared inbox (for each email)
- Open the Flow tab. Click the email card, then click Edit.
- Open the Reply to row. Type the shared inbox, for example
events@acme.com. - Click Save reply-to. A message says "Reply-to saved". You do not need to publish.
- Do the same for each email that must send replies to the inbox. If the field is blank, replies go to the organizer email on the Settings tab.
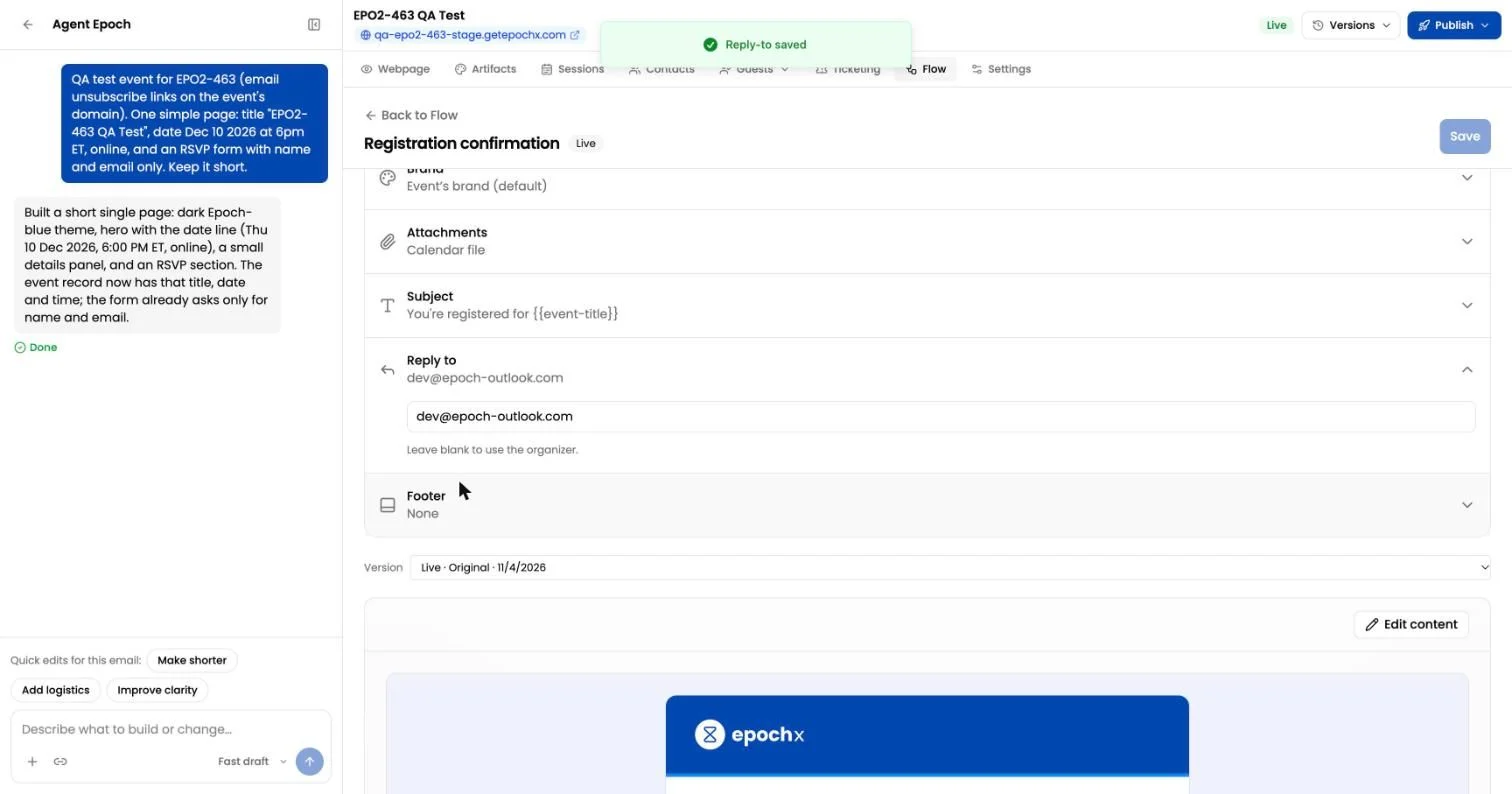
After step 3: the Reply to row shows the shared inbox and the message "Reply-to saved".
Check the results